Hilbert & Turner
Mathematics, made into pictures.
Named for a mathematician and a painter who were after the same thing from opposite directions: Hilbert, whose space-filling curve threads through every point of a square without ever crossing itself, and Turner, who dissolved solid things into light until you could only just still recognize them. The question running through this project sits between them — how much structure can you impose on a picture before it stops being a picture?
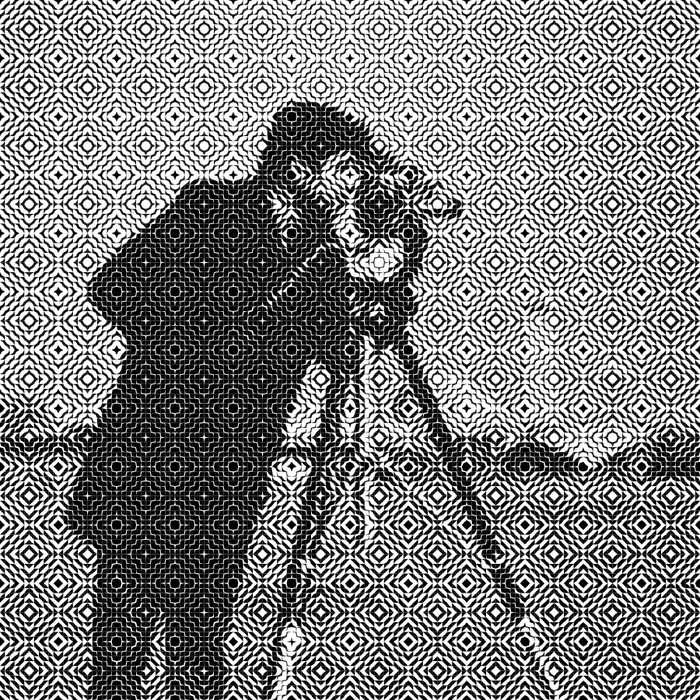
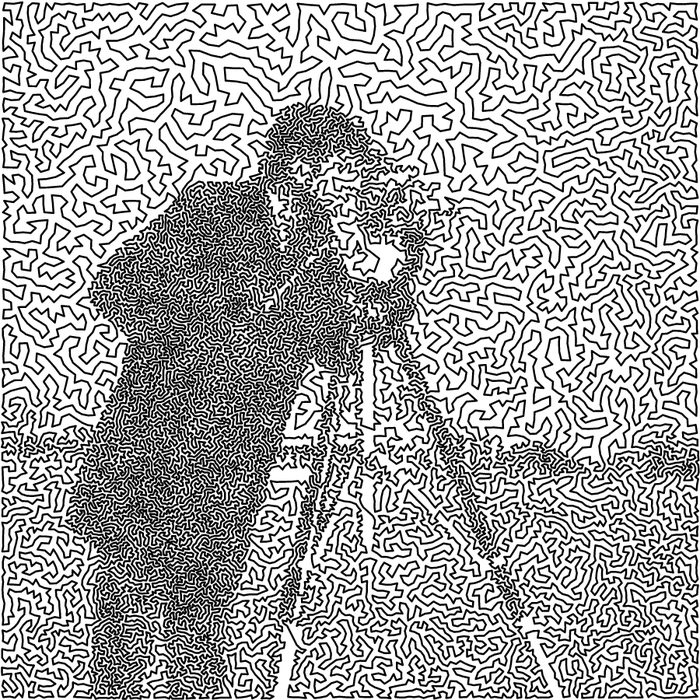
These pages document the command-line tools. Two programs that turn a photograph into art, following Robert Bosch’s Opt Art:
| Tool | What it does | Chapter |
|---|---|---|
truchet |
Rebuilds an image as a grid of flexible Truchet tiles | ch. 2 |
ariadne |
Redraws an image as one continuous, non-crossing line | ch. 3 |
Both read an ordinary image file (PNG, JPEG, TIFF, BMP) and write a new one. Neither needs Julia, a notebook, or any knowledge of the mathematics inside.
Install
The source repository is currently private, so these pages document the tools rather than distribute them. If you have access to the repository, you need Rust (1.95 or newer), and then:
git clone git@github.com:chapmanbe/hilbert-and-turner.git
cd hilbert-and-turner/DigitalArt/OptArt/Rust
cargo build --release
That produces two binaries in target/release/:
./target/release/truchet --help
./target/release/ariadne --help
To run them from anywhere, put them on your PATH. Symlinking into
~/.cargo/bin means a later cargo build --release updates them in place,
with no reinstall step:
ln -sf "$PWD/target/release/truchet" ~/.cargo/bin/truchet
ln -sf "$PWD/target/release/ariadne" ~/.cargo/bin/ariadne
Use cargo install --path truchet-cli (and ariadne-cli) instead if you would
rather have a fixed copy that does not follow later rebuilds — though you will
then need to re-run it after each change.
The build takes a few seconds and pulls in only a handful of dependencies — the
two *-core libraries where the mathematics lives have no runtime
dependencies at all.
Your first render
Point either tool at an image. Every option has a working default, so the shortest possible invocation is the tool plus a filename:
truchet photo.png          # writes photo-truchet.png
ariadne photo.png          # writes photo-ariadne.svg and photo-ariadne.png
ariadne writes an SVG and a PNG. The SVG is a true vector path — it scales
to any size without pixellating, which matters if you intend to print or plot
the drawing.
If a photograph comes out as an even scribble with no figure in it, or as a
flat silhouette with no modelling inside, its tones are the problem — ariadne
inks by darkness, and can only draw the range the picture actually spreads
across. Preparing a photograph works
through the three symptoms and their fixes.
What you can change
The defaults are only a starting point. The two knobs that change a truchet
render most are the tile pattern and color — and they combine freely:
truchet --color -p douat_72 -n 160 mandrill.png colour.png
That is the short answer to “how do I make a color Truchet with a particular
tile pattern”: add --color, and name the pattern with -p.
The seven tile patterns
-p selects which motifs fill the grid. random is the default; the other six
are periodic, and each has a distinct grain.
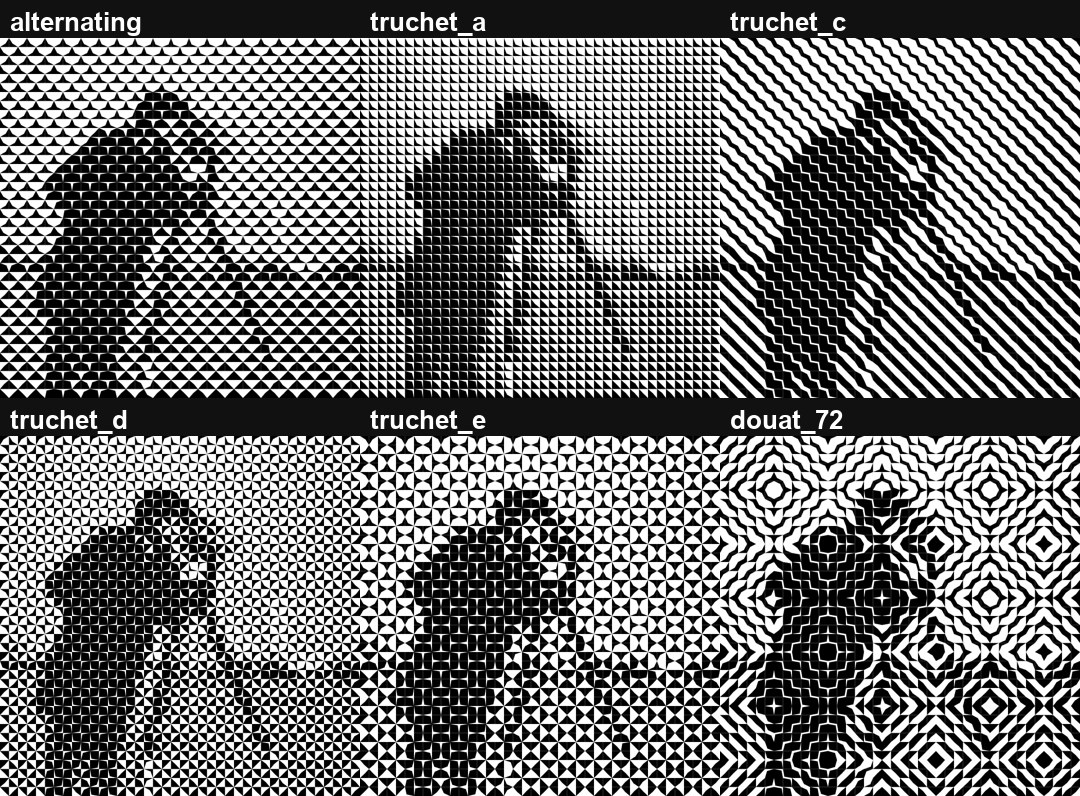
truchet -n 40 -p truchet_c cameraman.png
| Pattern | Character |
|---|---|
random |
independent draw per cell (the default) |
alternating |
2×2 checkerboard |
truchet_a |
uniform diagonal grain |
truchet_c |
diagonal stripes |
truchet_d |
pinwheels |
truchet_e |
dense weave |
douat_72 |
concentric diamond medallions, 12×12 period |
Those examples use -n 40 — a deliberately coarse grid, so the pattern itself
is legible. This is a trade, and the figure shows it honestly: the coarser
the grid, the more the pattern reads and the less the photograph does. At the
default -n 96 the same patterns become texture and the cameraman returns.
A large-period pattern like douat_72 wants at least ~4 repeats across the
image, ideally 8; -N 8 asks for that directly instead of counting tiles.
Color
--color inks each tile red, green, or blue by that channel’s value at its own
pixel, added on a black ground.
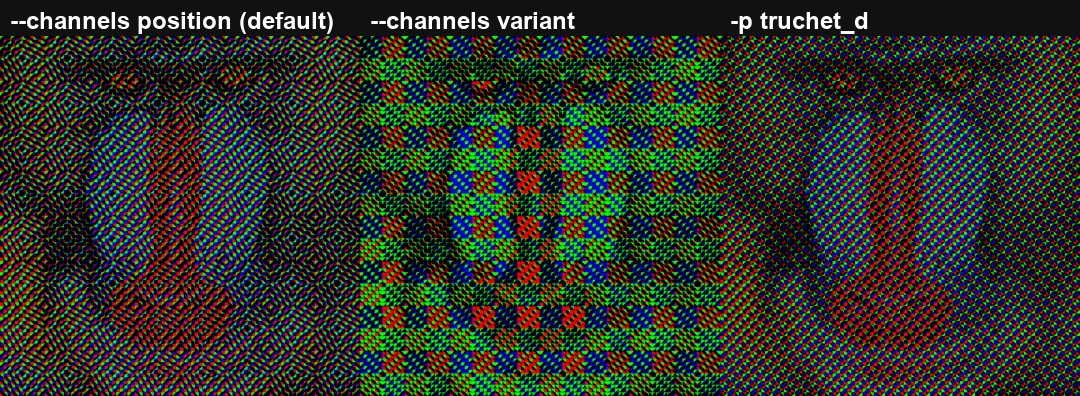
truchet --color -n 96 -p douat_72 mandrill.png
truchet --color -n 96 -p douat_72 --channels variant mandrill.png
truchet --color -n 96 -p truchet_d mandrill.png
Two things to know before you spend a render on it:
- Use a color source. On a grayscale image all three channels are equal, so
the result can only be dim gray. Every color example here uses
mandrill.pngfor that reason. - Keep the background dark. The ink is additive, so
--background whiteproduces an essentially blank image — there is nothing for light to add to.--inksworks fine against the default black ground.
--channels variant assigns ink from the pattern’s motifs rather than tile
position, which reads as coarser blocks of color.
Full option tables, including --tone, --seed, and the grid-sizing rules, are
on the truchet page.
Seeing what a command will do, before it does it
Both tools take --dry-run, which resolves and reports the configuration, then
exits without rendering. On a large image this saves you a slow render to
discover that the grid was not what you expected:
truchet --dry-run -n 144 -p douat_72 photo.png
ariadne --dry-run -n 40000 photo.png
Which tool for which picture
The two make quite different demands on a source image.
truchet keeps the image’s tonal structure but replaces all its detail
with pattern. It suits pictures that read as broad light and dark shapes — a
silhouette, a strong portrait, a high-contrast landscape. Fine detail is lost
regardless of settings, because an n × m grid of tiles carries exactly n × m
brightness values and nothing more.
ariadne reproduces detail through the density of a wandering line, so
it holds fine structure better, but it renders everything as line on blank
paper. It suits pictures with a clear subject and an uncluttered background.
Both work best on images that are already legible as small grayscale thumbnails. If you cannot tell what the picture is at 100 pixels wide, neither tool will help.
About the examples
Every image in this documentation was produced by the exact command printed
above it, using two standard test images committed under
DigitalArt/OptArt/Rust/examples/images/:
cameraman.png— 512×512 grayscale, the image the performance benchmarks usemandrill.png— 512×512 color, used for the color examples, since additive color needs a color source to show anything
You can reproduce any figure here by running its command against those files.
The Julia package
These are Rust ports of the OptArt modules in DigitalArt.jl — a companion
to that package, not a replacement. The Julia code remains the substrate for the
Pluto notebooks, where the parameters are live sliders and the intent is
exploration. The Rust tools are for when you know what you want and would like
it in under a second.
DigitalArt.jl also covers considerably more ground than these two binaries do: wallpaper symmetry and Fourier curves from Farris, and text set along parametric curves.
DigitalArt.jl documentation → — guides for the four subsystems, plus an API reference for all 29 modules.
They are roughly 30–40× faster than the Julia path, and every deterministic stage is golden-tested against fixtures generated by Julia. Some outputs match Julia exactly, some to floating-point tolerance, and the random ones not at all. Fidelity to the Julia implementation sets out precisely which is which — worth reading before you assume a difference is a bug.